
Need to hang a quilted wall hanging but don’t want to go full out with a quilt hanging sleeve?
Then consider the hanging tab method!
This is the quilting solution I turn to for most of my smaller quilted wall hangings when I need a fast and easy solution that does what you need it to do – hang your quilt on the wall!
If you’ve got a large quilt that you want to hang, then I recommend checking out last week’s post where I shared the classic Hanging Sleeve tutorial. If you’re planning on entering a quilt into a show, then that’s the technique you’re going to want to use. But if you’ve got a pretty quilted wall hanging that you want to admire on the daily, then this quick and easy hanging tab tutorial will do the trick!

*This post contains affiliate links, meaning, at no additional cost to you, if you click through and make a purchase, I may receive a commission.
WHY YOU NEED THIS TECHNIQUE
Why two methods?
Why not?! Ha!
The hanging tab technique is super practical to turn to when:
- You know the quilt will not be entered into a show.
- The quilt in question is smaller than a lap size.
- You want a quick hanging method that doesn’t require any hand stitching!
Three great reasons to have this quilty technique up your sleeve 😉
Let’s dive in!
WHY THIS QUILT HANGING TECHNIQUE IS GENIUS
There’s lots of ways to go about displaying your quilted wall hangings, this is my go-to method as it’s easy, quick and uses materials I already have on hand 😉
MATERIALS
Here’s all the tools and notions you’ll need to hang your quilted wall hanging:
- Quilted project – featured here is the Lunar Eclipse quilted wall hanging (I just made 4 blocks from the pattern and stitched them together 😉)
- (2) 3.5ʺx 3.5ʺ squares – you can use any material you want here, I opted to go with a *solid white to blend in with the white backing I used.
- (1) 2.5″x3″ rectangle
- *Thread
- *Sewing Machine
- *Iron
- Ironing board or *wool pressing mat
- *Rotary cutter
- *Ruler
- *Dowel
- *Command strip hooks
- *Rubbing alcohol
- *Cotton pads
- *Level (optional)
DIY QUILT HANGING TABS
CREATE YOUR HANGING TABS
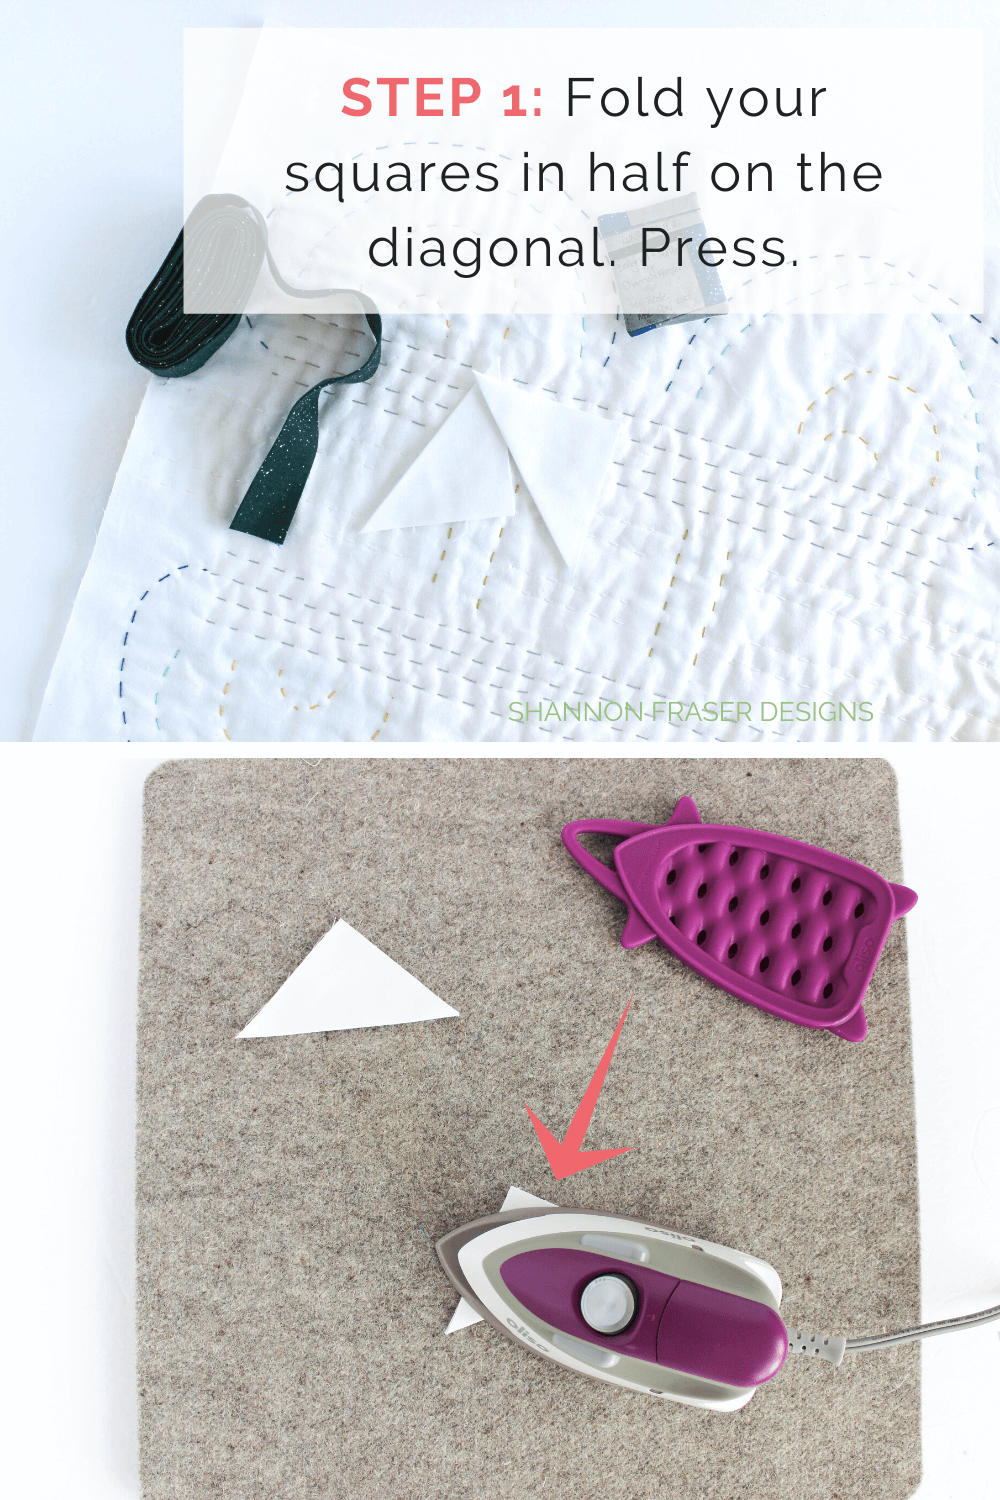
The first step you need to tackle is preparing your hanging tabs.
Start with your corner squares. Fold them in half along the 45-degree angle and press. Set aside.
For the center loop to slip the dowel through, you want to start by folding the fabric in half, wrong sides together, along the long edge and press. Open the fabric and then fold both edges in half-way, wrong sides together, to meet the crease mark you just created and press. Fold in half again, enclosing the raw edges, and press.
Stitch close to the edge, back stitching at the beginning and end.


You’re hanging tabs are now ready to be inserted into the back of your quilt.
ATTACH YOUR HANGING TABS TO YOUR QUILT BACK
Once your hanging tabs are prepared, you can attach them to the back of your quilted wall hanging.
Starting with the corner squares, place one in the top left and right corner of your quilt. Align the raw edges of your folded square with the raw edges of your quilt corners. Pin in place to secure.
Next, fold your quilt in half (top left corner to top right corer) to find the center of your quilt. Finger press to create a crease.
Fold your hanging loop in half, aligning the raw edges. Center the raw edges of your folded hanging loop in the center of the crease mark you created. Pin in place to secure.

With your hanging corners and loop pinned, stitch them in place using an 1/8” seam allowance. This will ensure that your tabs are nice and secure and will mean you won’t see your stitches as they’ll be covered by your binding – wahoo!

That’s all there’s to creating your own quilt hanging tabs. Super easy, right?!
WHEN TO ATTACH YOUR HANGING TABS
A quick note about when to attach your hanging tabs.
For some reason, I seem to always insert them after I’ve attached my first round of binding (i.e. I attach my binding to the front of my quilt and then hand stitch it to the back). I like to get my binding on and then I position my hanging tabs, sew them in place and then finish off hand stitching my binding down.
You can absolutely attach your hanging tabs before attaching your binding. It really comes back to your preference 😉

HANGING TIPS
Once you’ve decided where you want to hang your quilted wall hanging, I recommend washing the wall and then giving the area a nice wipe with a cotton pad soaked with rubbing alcohol. This will help your Command Strips adhere more effectively!
As soon as the rubbing alcohol dries, you’re good to go ahead and attach your strips.
Bust out a *level if you want to make sure your quilted wall hanging is nice and straight!

QUILTED WALL HANGINGS
If you haven’t tried stitching up a quilted wall hanging, then I highly encourage you to dive in and give it a go! They’re super fun to make. Not to mention quick! Plus, they just add the most glorious colour and texture to your room décor!
Here are just a few I’ve made to help get you inspired:
What’s your favourite way to hang or display your smaller quilts? If you need tips on how to hang a full size quilt, then check out the How to make a quilted hanging sleeve in 8 steps!
Happy stitching!
xo,
Shannon
Never miss a post – sign up for the weekly newsletter.
This post uses affiliate links. For more info, visit the FAQ page.

Hi! I’m not seeing how/where you used the command strips to attach the quilt to the wall. Are the hooks holding the dowel? How many hooks did you use? A few more photos showing that part of the process would be so helpful. Thanks!
Hi Grace, since the wall hanging was quite small, I believe I used two Command hooks that were placed about an inch in from either end of the mini quilt. The dowel sits directly in those hooks for a seamless look (i.e. you can’t see either the hooks or the dowel from the front)!
Thank you for this free and simple tutorial but when you make these ‘hooks’ then what? I can see no instructions or visuals as to what to do next? I have read the above instructions and still do not understand.
Oh, I mention that I use a wooden dowel to pass through the loops and end corners so that it fits seamlessly behind the top edge of your project. Command hooks are what I’ve used on the wall for the dowels to slot into. Works perfectly!
Thank you 🙂 I understand.