
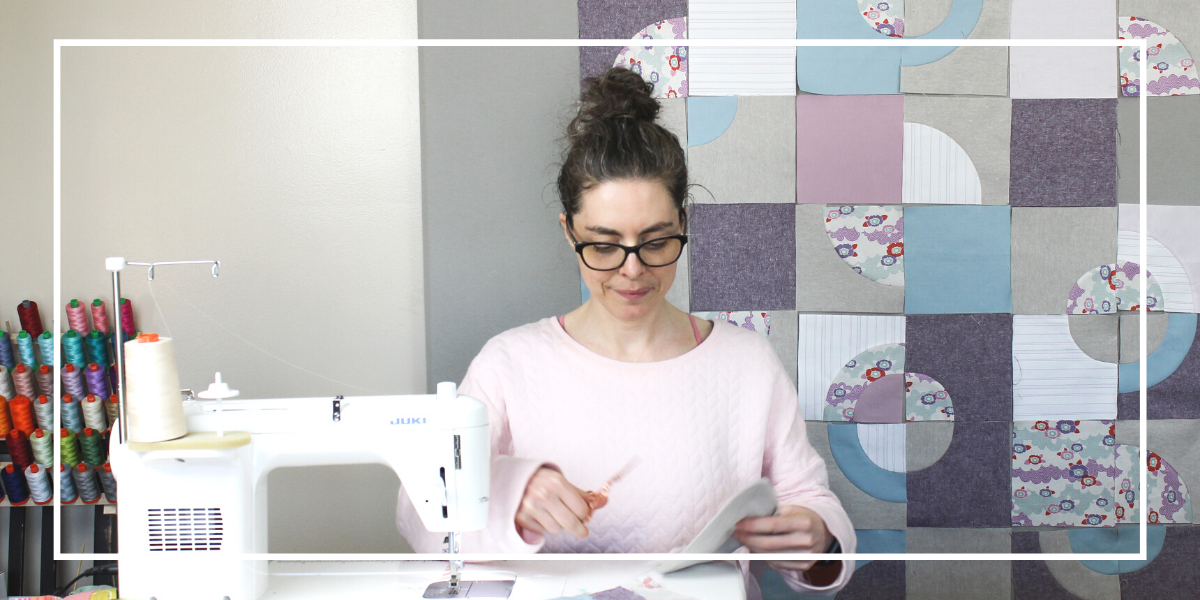
You probably read the title of this post and thought to yourself “Shannon, another quilted coat?!” – ha!
I get it!
There have been quite a few quilted coats that have popped up on the blog in the past year since I made my first one.
While the 3 other Hovea coats I’ve made featuring the Etched Diamond Quilt x Hovea Coat Pattern Extension were for me, this latest one was made for my best friend.
It’s one thing to make a quilted coat for yourself, but it’s an entirely different quilty adventure to dive in and make one for someone else!
Whether you’re here to be inspired on new textiles to feature in your own quilted coat, or whether you’re thinking of making a quilted coat for a loved one and wondering what the process looks like, I’ve got you covered – read on for some insight on both!

This post contains affiliate links, meaning, at no additional cost to you, if you click through and make a purchase, I may receive a commission.
Why I decided to make my BFF a quilted coat
While making my own quilted coats, I got to thinking that maybe my mum and best friend might like one for their own wardrobes. After all, there are only so many that I need in my own closet 😉 The big question was whether they’d want to wrap themselves in the comfort of a handmade quilted coat too.
I love them, but would they?
Well, back in April, while treating my bestie to a birthday brunch at our favourite breakfast restaurant in Montreal (Arthur’s Nosh Bar, in case you’re wondering), I happened to wear my Spring quilted coat. I hadn’t had a chance to tell her about it and ask her if it would be something she’d want too, before she commented on it 😊
So, I took the opportunity to ask her if she’d want me to make one for her. And she said yes!

The fabric selection process
Right after breakfast, we popped by my place to go through my fabric colour cards. This is yet another example of why I love having these on hand. This made it super easy to show the different fabric substrates she could consider.
Here are the fabric colour cards I have in my own stash:
- Pure Solids original format, extension, and this Swatch Set
- Cotton Couture
- Cotton Supreme
- Sprout Wovens
- Ruby & Bee Solids
- Essex Linen
- Kona Cotton
- Northcott Solids
We talked through the different colours and materials that she liked, and I had her try on my own coat to get a feel for the style and fit. I then took her to my fabric cabinet to see if anything caught her eye, and I loved that the first print that she mentioned was this gorgeous and very bold floral I’d just received from Art Gallery Fabrics.
Ultimately, she turned to me and said that this was my realm and she left it up to me to finalize.
So, where did things land?
Well, I had already planned on featuring some Sprout Wovens in jade and green shades for the Etched Diamond patchwork elements. Green is one of her favourite shades, and it felt very true to her style to feature those colours. I had designed a Kelly green version for her, and I know it would have looked amazing on her, but she’d specifically mentioned a darker grey colour, and I wanted to acknowledge that.
Exterior fabric
I also wanted it to be different from my own grey quilted coats, which is why I opted for this linen with a flex of pale turquoise woven throughout. It picked up on the turquoise and jade tones of the wovens beautifully.

Lining fabric
Since the floral really captivated her, I took a chance to feature that as the lining of the Hovea coat.
To balance things out, I opted for this turquoise geometric Cotton and Steel print that I’ve had in my fabric stash for a number of years now. It was just waiting for the right project 😉
For the pocket lining, I really wanted to feature this green print from the Fantasy fabric collection designed by Sally Kelly Fabrics. Only, I hadn’t made a size 10 before, and it takes more than a fat quarter to cut those pockets out. I made it work by adding some strips of coordinating linen at the base of the pocket. This means that when she peeks inside her pockets, she’ll mainly see the green print – exactly what I want the focus to be on😊

Binding fabric
The binding took me a minute to decide on. I initially wanted something different than a striped binding, but after searching, and searching and searching some more, I couldn’t find anything that fit. Either the scale was wrong, the print didn’t fit or the colour was off. Bleurgh. I even researched other striped binding colours and widths to see if anything caught my eye.
It didn’t.
So, I came back to my tried and true black and white striped binding. It’s a classic for a reason!


Narrowing down thread options
With the textiles selected, I turned my attention to picking the thread options.
I wanted the exterior of the coat to be understated, and so I knew I’d be matching my thread to the exterior background colour.
Where I was questioning things was the lining thread options.
Specifically, I was mulling whether to use the jade colour for both the sleeve and the interior or just the sleeves and go with this darker thread for the lining.
You know how much I love sneaking in details, so I opted for jade in 50wt on the sleeve and this dark green but in 28wt for the interior. The latter holds up to the bold nature of the floral fabric.
I’m thrilled with how it turned out.

The final detail was deciding on my big-stitch hand-quilted binding thread. I went with a jade colour in pearl cotton size 8 to tie in with the sleeve and pick up on the lighter colours in the Acqua di Rose print and the subtle jade fleck in the linen.
Learn how to big stitch your own binding in this tutorial.


The reveal
I had the chance to present the finished quilted coat to her the other day and, I’m happy to report she loved it!
Before officially gifting it, I wanted her to try it on so I could see how it fit before laundering the coat. Even though I pre-washed all the fabric, after laundering my own fall coat, I noticed things shrunk a little. Since the fit was spot on, I plan to forgo the dryer and lay the quilted coat flat to air dry.
Once that’s done, I’ll wrap her up and drop her off to be enjoyed this holiday season!

To make your own, you can find the Hovea and Hovea Curves coat patterns in Megan Nielsen’s shop, and to add the patchwork details, you can find the Etched Diamond Quilt x Hovea Coat Pattern Extension in my shop.
If you need some tips on selecting fabrics for your own quilted coat, check out:
- How Your Closet Helps You Select Fabrics for Your Quilted Coat
- 3 Tips to Pick Fabric for a Quilted Coat + Free Guide
- Latest Quilted Coat in My Spring Wardrobe
- Dive Into Me-Made Fashion with the Etched Diamond Quilt x Hovea Coat
- How the Etched Diamond Quilt x Hovea Coat Pattern Extension Came to Be
And if you’d like some company while stitching your own, come join the Winter (sold out), Spring (sold out) or Fall (sold out) 2023 virtual workshops! I share lots of tips and tricks in these sessions so you can avoid some of the mishaps I’ve run into while making my own!
Update – there’s the new Quilted Coat Course to help guide you through making your own quilted coat with step-by-step video tutorials to help you to quilty success.
xo
Shannon
Never miss a post – sign up for the weekly newsletter.
This post uses affiliate links. For more info, visit the FAQ page.

Do you ever ue flannel for the lining? If you do–Do you have a good source? I have signed up for your coat class.
Hi Janet, I haven’t used flannel myself as of yet. So far, I’ve used quilting cotton, linen and chambray. I have stitched with AGF Flannel and that felt lovely on a pillow! You can find some great flannel options at Thread Count Fabrics, The Fat Quarter Shop and Sew Curated. Let me know if that helps!
Shannon, can i be your other BFF?
Lol!! Thank you for brightening my day with your comment, Sally!! 💛
Is it possible to by the pattern for the jacket?? Love it!!!
Yes, absolutely! The Hovea Coat pattern is available from Megan Nielson and comes in regular https://bit.ly/HoveaCoat and curves https://bit.ly/HoveaCurves – if you’d like to add the patchwork details, the Etched Diamond Quilt x Hovea Coat Pattern Extension will help you do just that: https://shannonfraserdesigns.com/collections/quilt-patterns/products/copy-of-etched-diamond-quilt-x-hovea-coat-pattern-pdf – let me know if that helps!